Holiday Tips

I like to consider myself the Queen of Christmas. Christmas is my jam. Every year I think I couldn’t possibly get any more “into” it but every year I do. For me, it’s all consuming. But in a good way.

I used to put the tree up and decorate on the last weekend of November, then it was the week before that, then the weekend before, and this year, the tree went up November 19th. It gets earlier and earlier every year. And I’m ok with that, thankfully so is my family. Rex also loves Christmas, he doesn’t get super into the indoor decorating and rarely helps us with the tree, but the outdoor lights are where he shines (pun intended). If I didn’t know better I would swear he was part Clark Griswold when it comes to decorating the house and yard. The more lights, the more colour, the better. I’m pretty sure one of these years our house will actually be visible from space.

So as the self-appointed Queen of Christmas I thought I should share some tips for making the season easier! Most of the tips I am going to share with you are what I do, there are a few that I don’t but they are great tips anyway.


Wrapping paper:

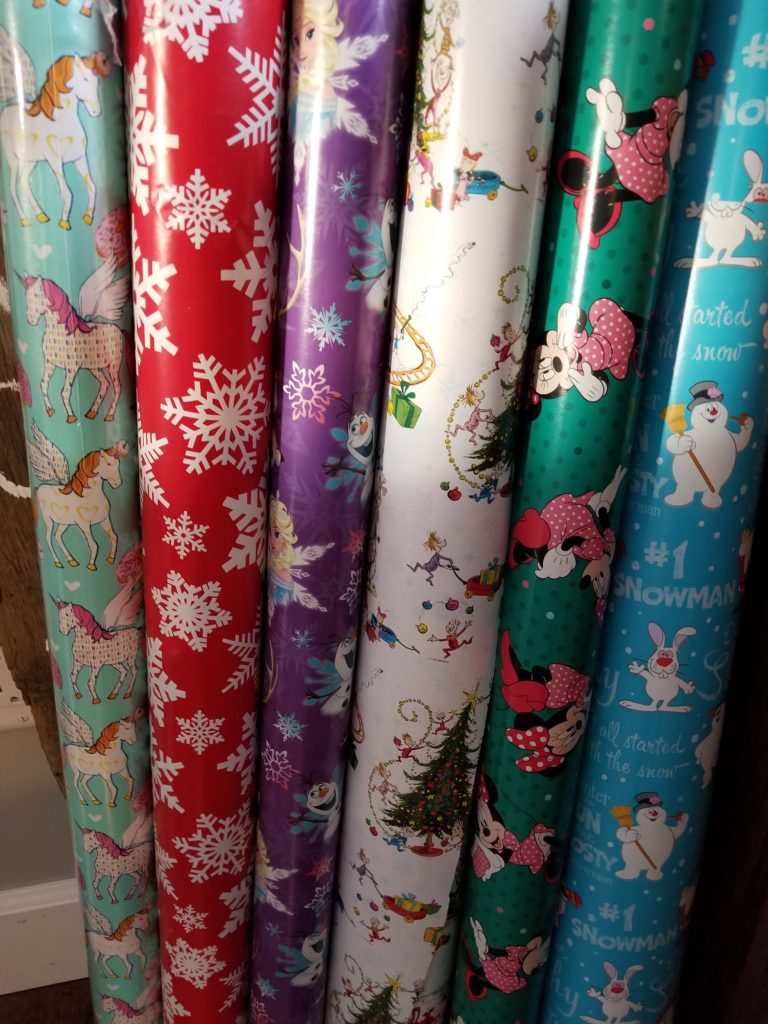
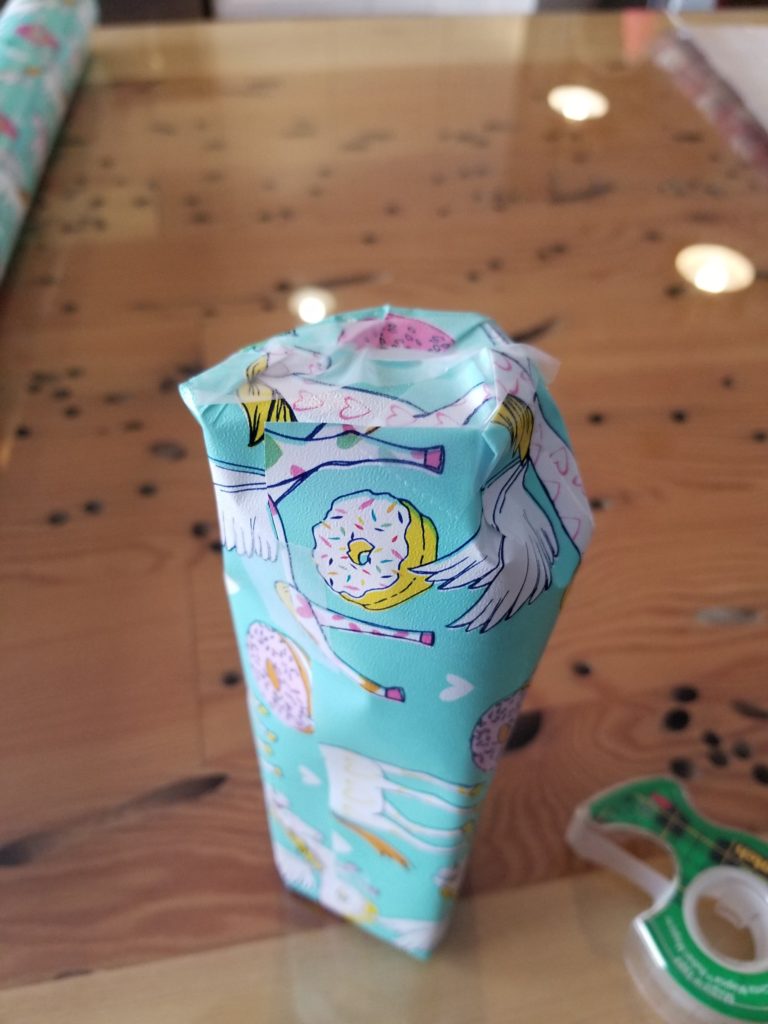
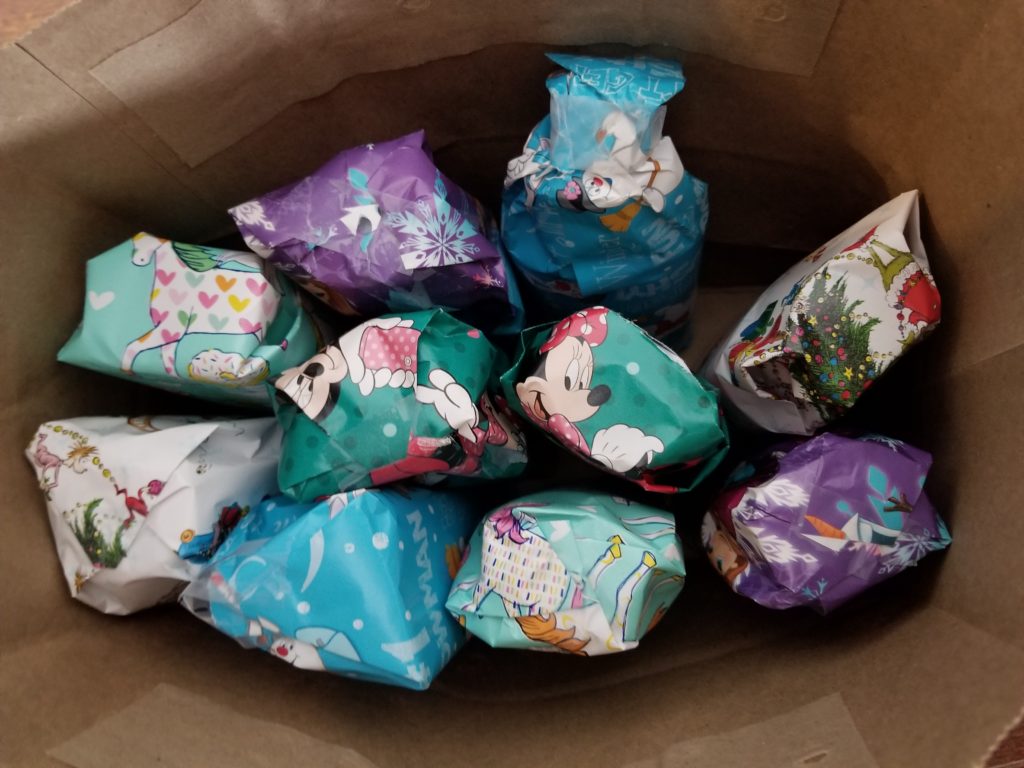
My first tip is to give each member of your family their own colour or style of wrapping paper. We have 3 children between us;  2 adult children (21 and 23) and an 8 year old. The adult children both have spouses which means there are 7 of us that have presents under the tree. And 7 of us that still get a stocking to open on Christmas. I mean, seriously, I would give up the “big” presents before I would give up the stockings. It’s my favorite part. I always wrap everything that goes in the stockings. My mom always did, and I will never stop doing it. Half of the fun of Christmas is the actual unwrapping part. Which means I have a lot of wrapping to do in the weeks leading up to Christmas, and a LOT of little wrapped presents. So I make it easier on myself and give everyone their own wrapping paper. I never need to label anything and when the kids come over they have no idea who’s gifts are who’s until I hand them their stockings. I feel like it makes it more fun. I also like to try to pick wrapping paper that fits their personalities a bit. This year some of them aren’t even Christmas themed. This year we have Dr. Seuss, Minnie Mouse, Frosty the Snowman, Frozen, Unicorns, a red Ho Ho Ho one and a white with red snowflakes.

Stock Up:

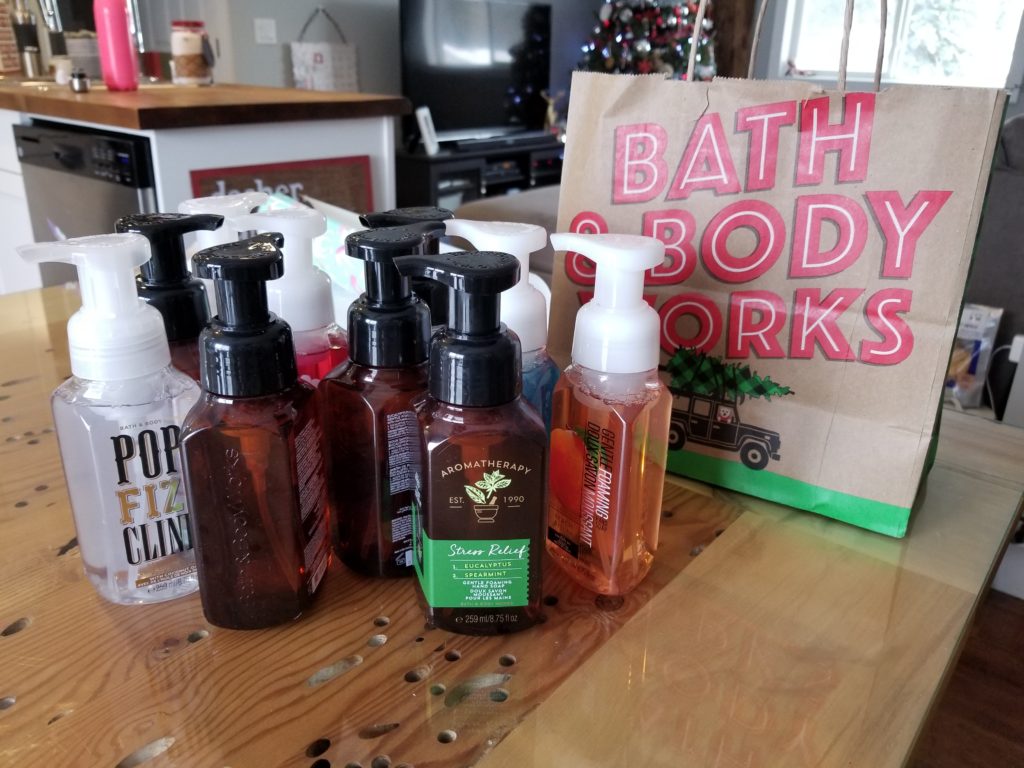
Stock up during the year on basics when they go on sale. For instance, Bath and Body Works easily makes my Top 10 list for favorite stores to shop. They always have wicked deals on if you’re not looking for something specific. This last week when I was there the hand soaps were 5 for $25 or 10 for $35. Clearly I needed 10 (insert my husbands eye roll here…). They make fantastic stocking stuffers and who doesn’t love a great smelling foaming hand soap??? Good thing none of my kids read this blog or they would know they’re all getting hand soap in their stockings! You’re welcome. It’s times like this that I feel like Oprah; You get a hand soap, You get a hand soap, You get a hand soap, Everyone gets a hand soap!! Stores like this are also good for stocking up on body washes and lotions, 3 wick candles (which are my FAVORITE!), and hand sanitizers. All of which are really really good at filling stockings relatively inexpensively. Plus it’s another one of those gifts were everyone gets the same thing but they’re all different smells and they can trade if they want to! Those kind of gifts are the best ones. A few years ago we bought packages of Hot Wheels cars for everyone. I think there were 20 cars in each package and the kids spent a good hour trading cars back and forth with each other until they were satisfied with their “garage”. So fun to watch!

Sticky Situation:

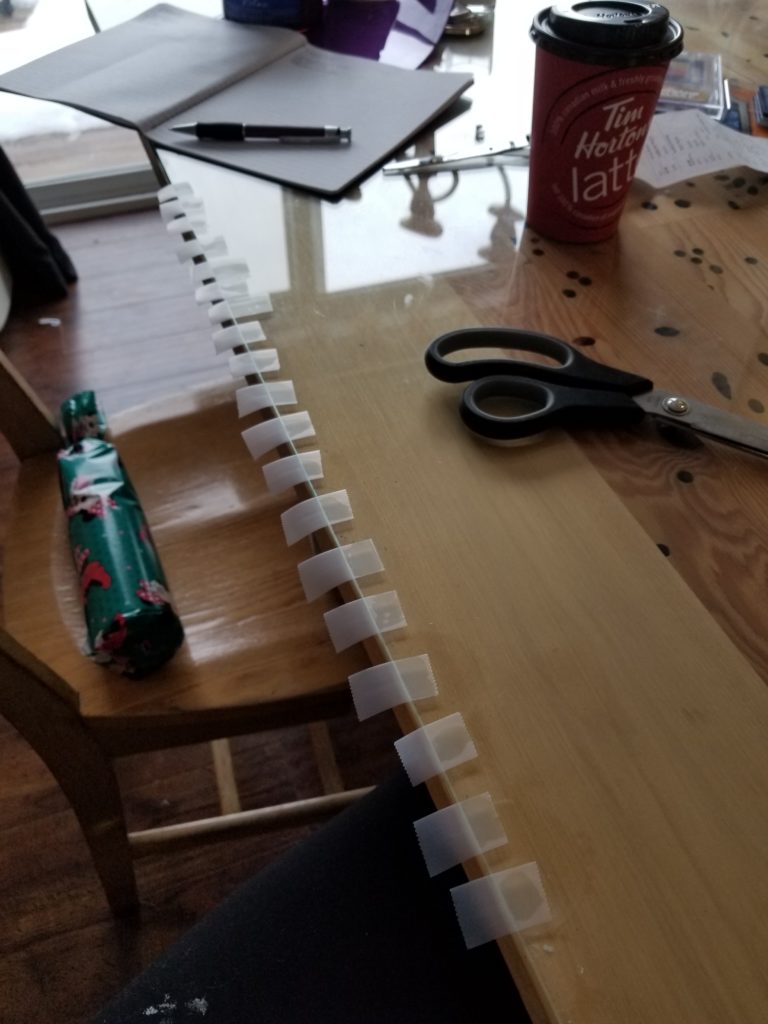
Next up are my tape tips. I’m not super fussy about brand, to me, tape is tape. If it comes off the dispenser easily and sticks 2 pieces of paper together, I’m good. That being said, a few years back I stumbled across the Scotch brand Pop Up tape dispenser. O. M. G. That thing is a life changer. It has a little elastic band thing on the back so it sits on your hand and it dispenses these perfect little pieces of tape. Only problem this year is I didn’t realize I was out of refills until this morning and there is no one nearby that sells them. So Amazon to the rescue once again. But they won’t be here for a week. So I’m stuck going old school. Wrapping presents requires the full use of both hands so unless you have an elf to cut pieces of tape for you as you need them you should probably just prepare ahead and line the edge of your work surface with precut pieces. I find this the easiest way when I’m wrapping by myself (which is honestly how I prefer it. Nobody to judge my bad singing…)

My little tape army! Having a cup of coffee nearby at all times helps a lot too!

Playing Fair:

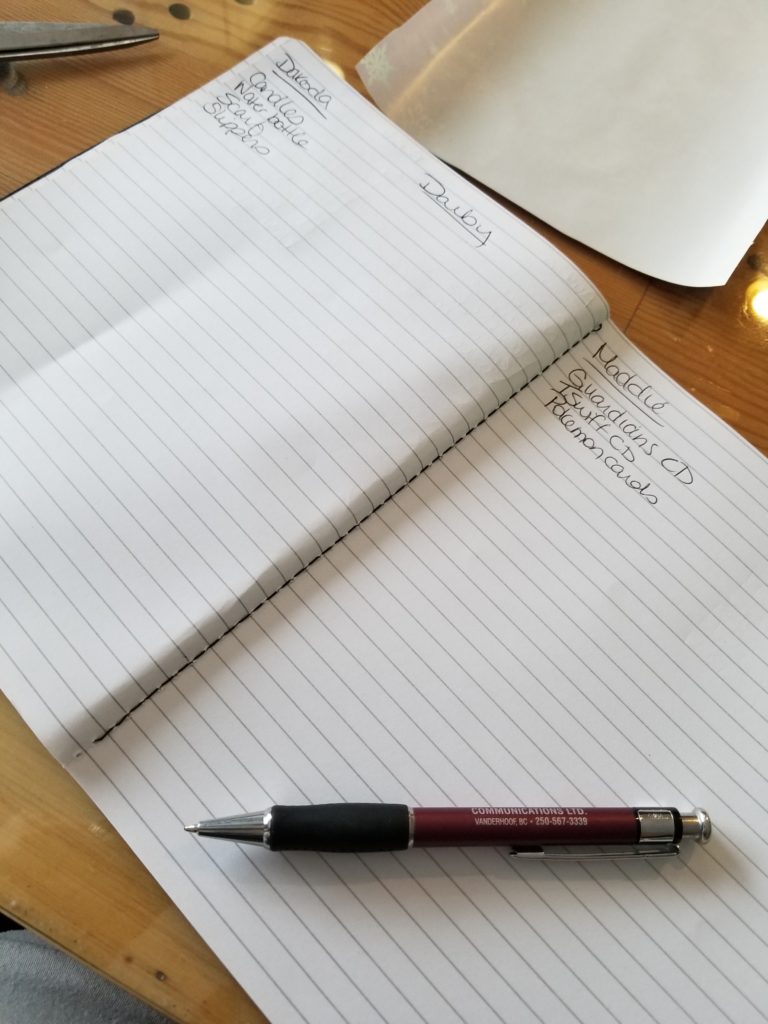
I like to make sure that all of the kids have the same number of presents to open and that they are all even when it comes to $$ spent on them. My parents did a great job of doing that when we were growing up and it’s something I feel very strongly about. We don’t love any one of our children more than another, so we always do our best to make it fair. That being said, we have such fabulous children, I don’t think any of them would even notice, let alone say anything, if something wasn’t totally even. Because I wrap so early and I have such a terrible memory, I often forget what each of the shiny little packages are so I keep a little notebook next to me when I’m wrapping and write down everything that I have wrapped for each child. It’s easy to see who I still need to pick up a thing or two for and it’s easy for me to figure out what package is what if I need to. The real trick here is keeping it somewhere that prying little eyes can’t see it, luckily only 1 of our children still lives at home so I can pretty much hide it anywhere higher than 5ft and she can’t reach it.

Budgeting:

If you’re on a tight budget (seriously though? Are there people who don’t have to watch every $?) one of the best tips I saw was to stash some money away each month through the year. $50 a month gives you $600 in December to spend on xmas presents. If you can’t be trusted not to dip into it, purchase a gift card each month and use them to buy presents (or give the gift cards). Prepaid Visa cards are accepted pretty much everywhere, even online, so it makes it a whole lot easier to buy presents when you can space it out over the year. It just requires a little forethought. This is one of the those tips that I see and I think “Wow that’s a great idea, I’m totally going to do this”. Then don’t. But seriously. This year I am going to do this.

We can’t all be Martha Stewart:

I feel like I have mentioned before how much I love Martha Stewart. Love might not be the appropriate word. Idolize seems more adequate. There is nothing that woman can’t do. Have you ever watched Martha and Snoop Doggs cooking show? It’s gold. Pure gold. I try to channel that woman every single day of my life. She inspires me to garnish every meal, find home decor in my back yard, and always keep my insider trading information to myself. But seriously. I can’t tell you how many times I have been called Martha Stewart in my 36 years on this planet. Honestly, I get called it a lot. It’s one of my favorite nicknames. But when it comes to wrapping stocking stuffers I no longer feel the need to “Martha” them up. Yep, I just used her name as a verb. I used to fret about how each little item was wrapped but I don’t anymore. Not once in the last 36 years has anyone ever commented on my wrapping skills, good or bad. So why am I stressing about it? Nobody notices if the corners aren’t folded exactly right. Nobody. Once you realize that and accept it, it feels very freeing. Like a huge weight has been lifted from your shoulders. Or is that just me taking this whole Christmas thing too seriously?

This is one of those less-Martha-Stewart-type wrap jobs and do I care? Not even a little bit!

Somehow this turned into a really long post. Sorry about that. In case you haven’t realized it yet, I love to ramble, especially when I’m talking about something near and dear to my heart. As it’s only November 28th, I’m sure I will have a whole lot more tips about Christmas for you so this will probably turn into a 2 part mini series.

Look at how cute they look when they’re wrapped and together. And I know who they all belong to! And I also know that Martha Stewart was NOT here.

Before I post I’ll leave you with some quick tips that require no explanation:

-buy Christmas cards after December 25th for the following year when they are dirt cheap. Stash them with your xmas decorations

– same with decorations. I rarely buy full price decor, I just wait till it’s on clearance and use it the following year

-keep cookie dough in the freezer, or even baked cookies usually freeze well in case of unexpected company

-be sure to be well stocked for coffees, teas, and hot cocoas during this season of visitors

-don’t throw scraps of paper away, you never know when you need a small piece to wrap a Chapstick

-remember: it’s thoughtful to wrap a toothbrush and put it in a stocking, it’s a dirtbag move to wrap a toothbrush and put it under the tree

Making Rosehip Jelly

I’ve always had a taste for food and drink that tasted like flowers. I was born in England and lived there until I was 9 years old. One of my favourite things from the store was a Turkish Delight; a rose flavoured jelly wrapped in chocolate. Even now, just thinking about it, makes my mouth water. It was also (and continues to be) my dad’s favourite. He has now figured out that he can order them by the case from Amazon, so look out world!

I’ve also mentioned a few times that I am the queen of doing things the difficult way.

Which is why, when I read an article about rosehip jelly I thought it was perfect for me! It’s time consuming, difficult (not really), and not the norm so I was sold!

I started by “harvesting” (see what a fancy term I used for “picking”) the rosehips from my cousin, Allana’s, rose bushes. She had these amazing large, deep purple rosehips I hadn’t seen anywhere before and I thought they would lend a beautiful colour to the jelly. We harvested what we thought was about 2lbs of hips and I took them home and got to work.

I read a few recipes and how-to’s on the line (shout out to my fellow Internship fans!) and decided that this was the one I would attempt.

I gave them a good clean and cut of the straggly bits before measuring out 2 quarts (about 8 cups) into a large stockpot. I added 6 cups of water and set them to boil. After they started to boil I turned the heat down and just let them do their thing while I made dinner.

After about an hour I checked them with a fork and when they were soft enough to mash I smashed them all up with my potato masher.

The I set a colander over a large bowl and lined it with 4 layers of cheesecloth before dumping the pots contents in. Then I just let is drip for about an hour while we ate dinner and chatted with our company (stepdaughter again, damn, I must be a good cook 😉 ).

Now I’m going to confess something…..

Other than helping my mother in law with our wedding jam, this was my first canning experience. And I am seriously super proud of myself and super motivated to can all of the things!!!

At this point in the recipe I followed it to a tee, which is something I don’t often do, but I was terrified I was going to do something wrong! I ended up with 6 full jars and 1 partial jar which I didn’t seal, we will just eat that one first. I had borrowed my mom’s canner but didn’t end up using it. My mother in law has been canning for years and she says she doesn’t use one so I thought I would brave it and just make sure the jars and lids were hot, fill them will the hot liquid and pop those lids on quickly. I am happy to report that those beautiful deep pink jars of jelly all started to pop one right after the other.

I don’t know how many of you can, but I think that a jar popping is probably one of the most satisfying sounds on earth!

The only problem is…..before the night was out, most of these jars were spoken for…..guess I had better get harvesting again! All of the wild roses on the road sides are just loaded with rosehips this year so that should keep me busy for a while!!

Enchiladas with 3 sauces!!

My stepdaughter and her boyfriend invite themselves for supper on average about once a week. I LOVE it. I love to see them. I love that they feel comfortable enough to just invite themselves over. I love to cook for other people.

BUT I HATE figuring out what to make most of the time.

They were here last night for supper and as they were leaving I said “Next time you invite yourselves for dinner can you at least tell me what to make?”. So Austin said “Enchiladas.”

“Well,” I said, “that’s easy. Consider it done.” To which he replied “Excellent. We’ll be here tomorrow!”

So we got them 2 nights in a row this week!

I also can’t ever just do things the easy way, I always feel the need to outdo myself, to one-up myself, to make yesterdays Kelly just feel a little bit bad about how mainstream she was. Which means I couldn’t make just one kind of enchilada sauce. NOOOOOO. I had to make 3! (Ok, so that’s a bit of a lie…..I only made 2……I bought the 3rd one, but SHHHHHHH nobody needs to know that except you and me!)

I have made the red sauce mulitiple times. It’s delicious, it’s the traditional enchilada sauce (I think!? I’m no enchilada expert!). And the white sauce? It’s rich and creamy with a great Chile flavour. I’ve also made it several times! They are both really easy and I would recommend either one.

Or both!

To make my enchiladas I use a smear of sour cream on a flour tortilla, top that with a spoonful  of black beans, a spoonful of corn (straight from the can!), a scoop of cubed cooked chicken breast (usually cheat and buy a rotisserie chicken!) and a sprinkle of grated cheese. Then I roll them up and place them seam side down in a baking dish.

After I make up the sauces (recipe for red sauce found here, or white sauce found here) I spoon them over the top and sprinkle it with cheese before baking in a 425 degree oven for 20-25 minutes.

Delish!!

Easy delicious (and inexpensive!) dinner!!

We have breakfast for supper probably once every 2 weeks. My husband and daughter think it’s because they love it so much. The reality is, it’s easy. And fast. And delicious. AND they love it so much.

But tonight was different. We had a day in the neighbouring “big city” and had shopped until we dropped (or until the $$$ ran out) and the last thing I wanted to do when we walked through the door was make a big elaborate dinner. I had planned on making a simple stir fry. It’s another one of my go-to’s when I can’t think of anything else to make but I really didn’t want stir fry so eggs it was.

But we had no bread for toast, so eggs on toast was out. As was French toast. I dislike pancakes (unless we’re talking Pumpkin Spice pancakes then I’m a happy camper!). We had no bacon (we NEVER have bacon). What the heck was I going to make with eggs?? Then it occurred to me that I have never made eggs baked in tomato sauce for Rex.

What?!?!?

We’ve been together almost 6 years and I haven’t made it for him. What the heck? Seriously?

This HAS to be remedied.

I don’t know why it’s been so long since I’ve made it. It’s freaking delicious!

I started by heating up some olive oil in one of my cast iron enamel pans and cooked up about 3 garlic cloves, then added a can of diced tomatoes, a can of whole tomatoes, some basil, and some salt and pepper. Seriously, that’s it. I cooked all of that down for 20-25 minutes until the tomatoes broke down and the sauce started to thicken then I sprinkled in some parmesan cheese and gently cracked eggs into the sauce and put it into a preheated 450 degree oven for 13 minutes.

While it was in the oven I cut up a beautiful rustic crusty loaf of bread and set it all out on the table. I have taken to just serving it in the dish I cook it in (less dishes and I love the rustic-ness it adds to the meal), and I gotta say, it just looks so beautiful!

We’ve been trying hard not to spend so much money on groceries, and this supper is a cheap one! Canned tomatoes are on sale at the moment for $1 each and I paid $3.99 for the loaf of bread. 

My 8 year old LOVED it (she says I’ve never made it for her, either. Damn, I have been slacking…), my husband was a happy man, and all 3 of us ended up with clean plates!


The sauce is amazing, and demands a hearty rustic crusty bread to soak it all up! I always top mine with a drizzle of olive oil, my husband topped his with Parmesan cheese, and our daughter ate it as is. It’s delicious any way you choose to eat it!

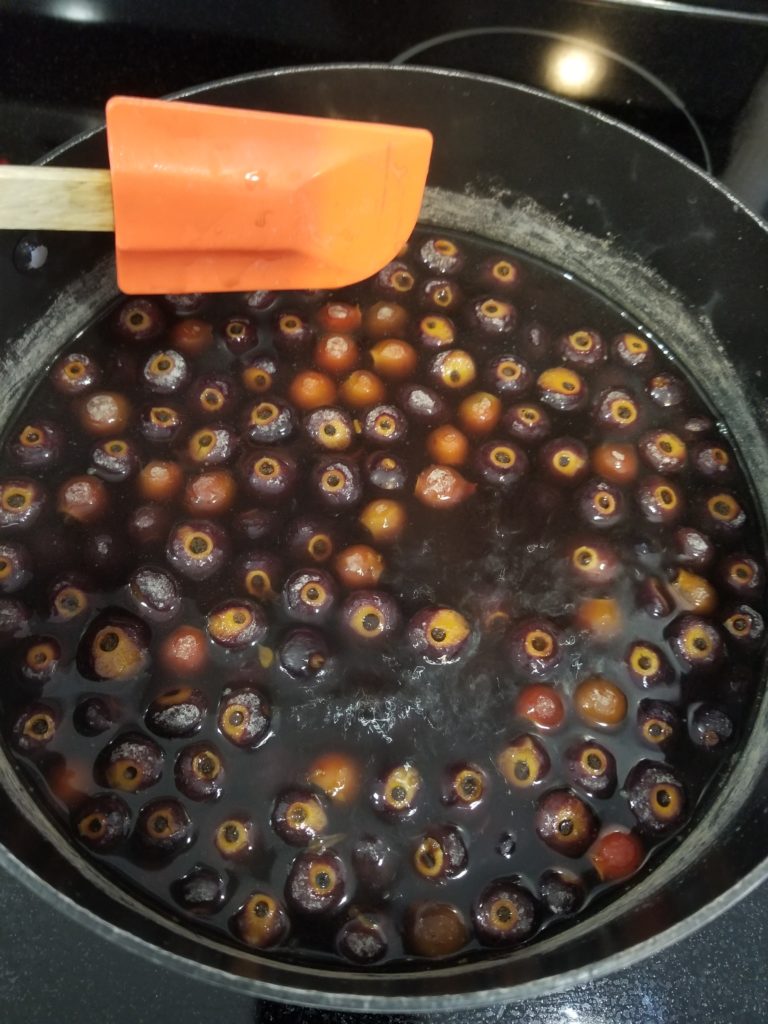
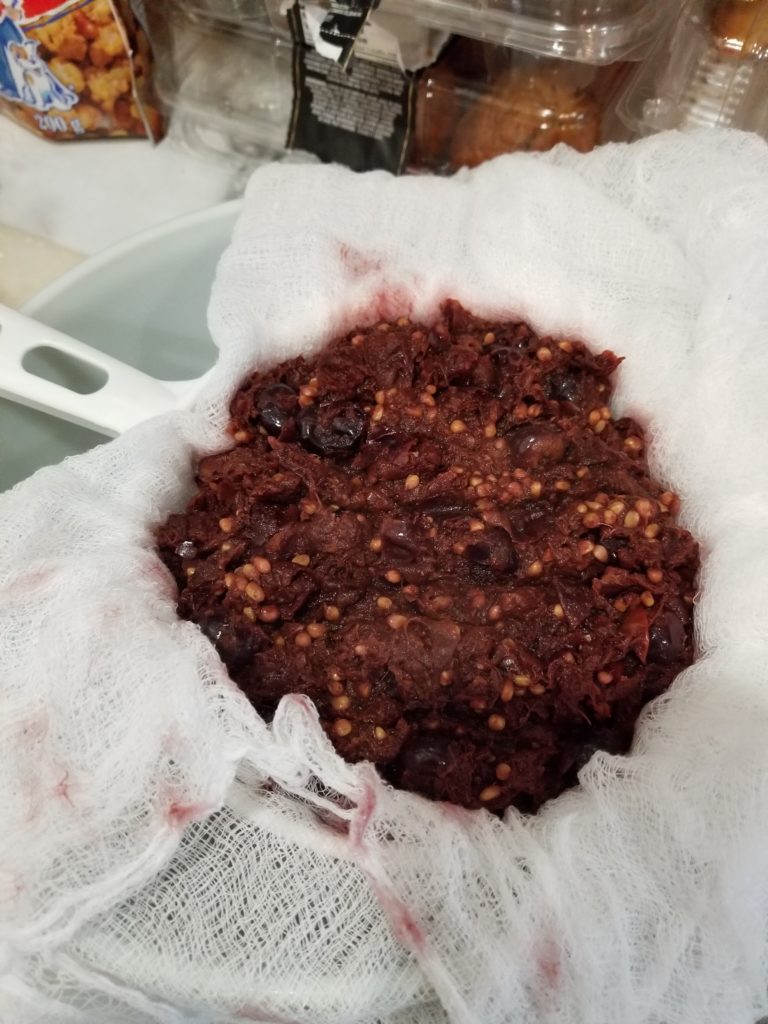
And the leftover sauce?

That’s tomorrow’s spaghetti sauce!

Bam!

You’re welcome tomorrow-Kelly, you’re welcome!

Making beautiful and easy vintage wedding confetti

Like many, I have had a fantasy Pinterest wedding board for years. I think I started my wedding board 5 years ago, which means we were only about 6 months into our relationship. It’s not that I started planning our wedding then, it’s just that there are so many great ideas on Pinterest it’s important to save them when you see them. You never know when you might need them in the future.

I was under the impression that I wouldn’t marry again (my previous marriage was short and not particularly pleasant at times so I just didn’t feel the need to do that again). Don’t get me wrong, it wasn’t that I wanted to be alone. Just that I thought I would be happy to live together without the need for that piece of paper. But then things got serious between Rex and I and the thoughts of what our wedding would look like started to creep into my head.

I mean, after all, I am a girl, it’s only natural.

Before I had even met Rex I used to always say to people that everyone that got married before the invention of Pinterest should get a do-over. Fast forward to today, about a month after the wedding and I can safely say it was a Pinterest-perfect wedding. As many of you know, I am a do-it-yourself kinda gal. So of course, I am diy-ed as much as I could. I had saved a pin with sheet music rolled into a cone filled with flower petals. I loved the idea but as we had a flower and lace thing going on, I decided I would use paper doilies.


Dollar store paper doilies and dried flower petals! So cheap and easy to come by!

I am thrilled with how they turned out, I think they are the perfect vintage, garden-party, old English addition to our special day. I don’t know if it’s a tradition in Canada, but in England (where I am from) throwing confetti at the bride and groom is essential. It’s not a proper wedding until you’re digging confetti out of your dress all night. In place of traditional confetti (which we have found difficult to find in Canada) I opted to use dried flower petals. They are beautiful, and they smell good!!

It’s an extremely easy craft and they were one of my favorite elements of our wedding!

Simply roll up a paper doily (I used the 6.5″ size round ones and some 6.5″ square ones), and glue the edge with a hot glue gun.

Aren’t these flower petals beautiful? I love them!

And fill with dried petals. I had bought 3 shoe boxes full of dried flower petals cheaply on a Facebook page, and I started drying and saving all of the flower petals from flowers I had bought to jazz up the kitchen, and I didn’t end up even using 1 full box but I’m sure I’ll find a use for the remaining 2 boxes!!


We purchased this Franks beverage crate at an antique store in Arizona during one of our trips down there and it used to live on our kitchen counter with mason jars in that used to hold our utensils but it made the perfect display crate for these confetti cones.

So fast and easy! And beautiful!

Quick and easy birthday class treat!

My mini-me just turned 8 and she loves to have treats to take to school to celebrate with her friends. In the past I have done the cupcake thing, but let me tell you, it’s exhausting. I feel the need to outdo myself every year and even though I am no longer working outside of the home, I don’t have the time or energy to compete with myself in the kitchen!

So this year I thought I would try something new.

It was so nice to be able to take them to her class and her be proud to hand them out and still have my sanity. Cupcakes always end up leaving a mess all over the classroom and the kids, so not only was this quick and easy to prepare, it was mess free and easy cleanup for the teacher!

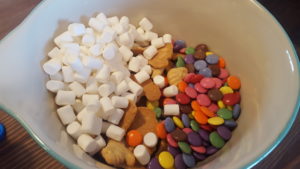
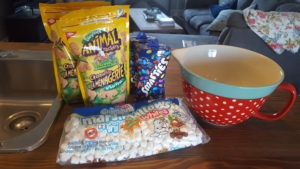
I had originally planned on using golden graham cereal, or small graham cookies shaped like rabbits, but the Animal crackers were on sale so they won!

I mixed the Animal Crackers with a package of Smarties, and half of a bag of miniature marshmallows and then packaged them into snack sized Ziploc bags.


I printed off some quick and easy Avery labels to add to the front of the bags. The labels really needed something to jazz them up but our internet was down for a few days (TORTURE!) so I couldn’t download any cute pictures, but the kids don’t notice anyway!

Easy Peasy!

And the kids LOVED them! (As did the teacher! That’s my number 1 recommendation when making treats to take to class, DON’T FORGET THE TEACHER! They love treats and I can’t think of a single person who deserves a treat in the middle of the school day more!) 

Hello world!

makeup and my hair is chaotic, but I am covered in wood shavings wearing my pink tool belt so I am genuinely happy!

HI! Welcome to my blog! I’m going to start this thing with an introduction to who I am, how I got to be here, and what you can expect in the future.

My name is Kelly, I am 36 years old and I was lucky enough to grow up on a farm in Vanderhoof, BC. I knew what I wanted as a career when I was in Grade 6. I knew, without a shadow of a doubt, that I was going to be a Veterinary Technician. I got my diploma from Lakeland College in Alberta in 2003, and have spent the last 13 years working in veterinary clinics throughout BC. I have loved my career, and I like to think I was really good at it. But this last year, something changed. I was still enjoying my work, I was still rocking it, but I was starting to feel like something was missing. I wasn’t as happy as I knew I could be. I was feeling lost. I am engaged to a man who makes all other men look like duds. I have a daughter who is the most amazing creature I have ever met. I have 2 adult-ish almost-step-children (that’s a mouthful…) who keep me on my toes. I have a beautiful home, a quirky little dog, an incredible extended family…..well, you get it….I have it all. But still something was missing.

So, I did the only thing I could think of to get out of my rut, I quit my job.

I had grand ideas when I gave my notice of opening my own store. There was a local business up for sale that had been presented to me and a friend, and we were seriously considering it. We went through the books, we made a plan for what our store would look like, we had it all figured out, but still something didn’t feel quite right. Her plans for life changed and they were looking at a pretty big move in the near future so she backed out of the project. Upon reflection my idea of what I wanted in a store just seemed so different from what was being offered that it seemed to make more sense just to start from scratch with a new location, and an entirely new store. I found a location, I made a list of potential vendors, I even made a business plan. I met with a local group dedicated to helping entrepreneurs succeed. But still something didn’t feel quite right. I was excited about the idea of opening my own store but I wasn’t 100% certain that is what I wanted. I was enjoying some time off of work, enjoying having the time to spend with my aging grandparents, enjoying spending some time with my mom who had recently retired, enjoying volunteering at my daughters school every other week, I was just enjoying being me.

I had started puttering around in my inlaws’ wood shop a few years ago with my boyfriend. We built a few things for ourselves, our biggest project being our dining table. He owns a building supply store in town and over the years had been collecting interesting wood and salvaging things that came his way. He had a stash of some worm wood that had been delivered to the store years ago (like, we are talking 20 years ago, the man accuses me of being a hoarder but……. 😉 ). All of the holes and character in the worm wood instantly drew me to it. There wasn’t enough for an entire dining table, but there was enough for a center panel for a table! Our beautiful dining table was our first large project, and in a wood shop, there is a STEEP learning curve. We had this table built and dismantled completely 3 times over the course of 2 years. Yes, you read that right, 2 YEARS! We can’t ever part with this table, there is so much blood, sweat, and tears in it! Once it was finally complete we purchased a large piece of tempered glass to cover the entire top and now we have this amazing show stopping table. I’m telling you, anyone with kids should go out and purchase a piece of tempered glass for their dining table. That thing is the easiest thing I own to clean! She can color and paint and destroy whatever she wants (she’s really into science experiments at the moment, which means we go through TONS of baking soda and citric acid AND paper towels. Seriously, even as I type this she is grabbing the food coloring from the baking cupboard for her next experiment. Phew, thank you glass dining table!) and it all just wipes right off!

Pretty amazing, right?

This table sparked a fire inside me. I love shop time. I love being able to take a piece of wood that looks like it should be thrown on a bonfire and turning it into something incredibly beautiful and unique. The hobby blossomed into a little home based business. I started taking custom orders for clients, and started spending as much time as I could in the shop. I’ve built dining tables, coffee tables, bookcases, decorative items, barn doors, you name it, if it’s made from wood, I’ve either made it or it’s on my to-be-built list.

I’ve always enjoyed crafting. It’s something I get from my mother. She is Wonder Woman. I’m not kidding, I can’t even begin to find the words to describe my mom. I know everyone believes their mom is THE mom, but sorry, you’re all wrong. It’s my mom. My mom is THE mom. She is everything I hope to someday be (you know, when I grow up, and figure out what I want to do with my life and magically become an adult). She is probably the most creative person I have ever met. She can do anything, and is constantly learning new techniques and new crafts. I am blessed to have gotten that from her. I am always on Pinterest checking out new things I can make for our home, and to sell.

Wow, that turned into a novel. Sorry! And I really didn’t even discuss that much! Maybe I should leave some for another day…I’ll try to pick up the pace a bit.

At the end of a rough day at the vet clinic I used to come home and type an imaginary article that would never be published anywhere. It was usually an article to do with responsible pet care, what happens in a vet clinic, pretty much anything, I just needed to write. It was my way of processing the day, my way of getting out my thoughts and feelings that I couldn’t express any other way. So it seemed logical that I start a blog. I am going to post tutorials on the crafts and woodworking I do and would also like to use you all as my motivation to get my butt in gear and get into the best shape of my life. I know these 2 things aren’t related but crafting and fitness are both part of who I am. I have been overweight my entire life and have dedicated this year of rediscovery to also finding the inner fit me. I have taken up running again and although it is slow going to start, I am starting a running streak (thanks Charlotte, my amazing coach, and friend, who is currently #streaking1mileatatime and has encouraged me to do the same). From today forward I will be recording my miles, keep an eye out for #streaking1mileatatime and keep track of where I’m at! Feel free to send me a message and kick my butt if you don’t hear anything about working out or running for a few days! I’m counting on you all to keep me focused!

I grew up being a rough and tumble farm girl and in the last 10 years or so blossomed into an uber-girl. I love anything pink, anything girly, anything to do with health and beauty. I’m going to be posting some product reviews along the way of health and beauty products that I use or come across (thank you Fabfitfun!). I have started a youtube channel, and although I will be posting some crafting tutorials on there, it will likely be primarily videos of me being a girly girl!

If any of you come across something you think I would be interested on, please, pass it along. Anything crafty, girly, or fitness related I am totally into and would be happy to post a tutorial or review of!

K. xo